CentOS8下的Docker使用详解
一、CentOS8下Docker的安装
curl https://download.docker.com/linux/centos/docker-ce.repo -o /etc/yum.repos.d/docker-ce.repo
yum install -y https://download.docker.com/linux/fedora/30/x86_64/stable/Packages/containerd.io-1.2.6-3.3.fc30.x86_64.rpm
yum install -y docker-ce
二、CentOS8下Docker的启动与停止
启动命令
systemctl start docker
service docker start

关闭命令
systemctl stop docker
service docker stop

查看 Docker 状态
docker info
三、镜像加速器配置
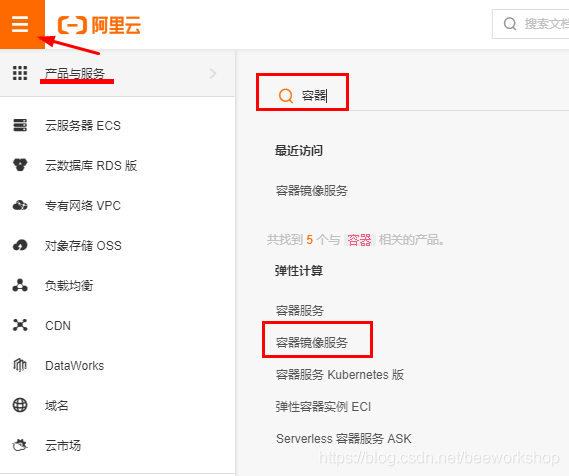
1. 访问阿里云
https://www.aliyun.com/
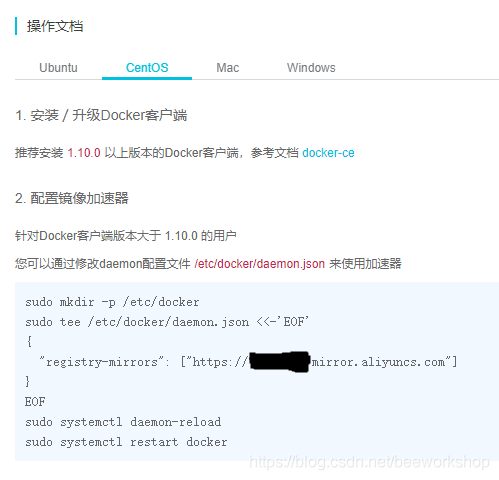
2. 配置镜像加速地址
进入控制台
查看配置的镜像加速地址
docker info
查看Registry Mirrors:部分。
四、Docker的基本操作
基本操作
进阶操作
编排工具docker-compose的使用1
编排工具docker-compose的使用2
五、其他技巧
1. docker容器强杀
docker kill 容器 ID 或名称
2. 查看docker容器日志
docker logs -f -t container_name
3. 查看docker容器中运行了哪些进程
docker top container_name
4. 运行docker容器不自动退出然后进入容器
docker run -d -it 63bd2b510f17 /bin/bash
或者
docker run -id d70eaf7277ea # 有时不灵

docker exec -it 03d80e28c244 /bin/bash
注意,/bin/bash要放在最后。
5. 查看容器的配置信息
docker inspect 03d80e28c244
6. 容器与宿主机之间拷贝文件/目录
docker cp --help

Usage:	docker cp [OPTIONS] CONTAINER:SRC_PATH DEST_PATH|-
	docker cp [OPTIONS] SRC_PATH|- CONTAINER:DEST_PATH

Copy files/folders between a container and the local filesystem

Use '-' as the source to read a tar archive from stdin
and extract it to a directory destination in a container.
Use '-' as the destination to stream a tar archive of a
container source to stdout.

Options:
 -a, --archive Archive mode (copy all uid/gid information)
 -L, --follow-link Always follow symbol link in SRC_PATH
六、IDEA中一键打包docker镜像
1. 修改 Docker 服务配置
vim /usr/lib/systemd/system/docker.service
找到如下内容
在上图红色标记的最后加入如下内容
-H unix:///var/run/docker.sock -H 0.0.0.0:2375

# -H unix:///var/run/docker.sock : 开启一个对外主机服务,使用 docker.sock 文件管理。
# -H 0.0.0.0:2375 : 允许什么客户端 IP 访问当前服务,当前服务对外暴露的端口号是什么。2375是自定义的端口。

systemctl daemon-reload
systemctl restart docker
2. POM文件中引入相应插件
<build>
 <plugins>
 <plugin>
 <groupId>com.spotify</groupId>
 <artifactId>docker-maven-plugin</artifactId>
 <version>1.2.2</version>
 <configuration>
 <imageName>projects/eureka:1.0</imageName> <!--指定镜像名称 仓库/镜像名:标签-->
 <baseImage>openjdk:latest</baseImage> <!--指定基础镜像-->
 <dockerHost>http://192.168.74.131:2375</dockerHost> <!-- 指定业务部署服务器仓库地址-->
 <entryPoint>["java","-jar","/${project.build.finalName}.jar"]</entryPoint> <!-- 容器启动执行的命令 -->
 <exposes>
 <expose>8761</expose><!-- 发布端口 -->
 </exposes>
 <resources>
 <resource>
 <targetPath>/</targetPath> <!-- 指定要复制的目录路径,这里是当前目录 -->
 <directory>${project.build.directory}</directory> <!-- 指定要复制的根目录,这里是 target 目录 -->
 <include>${project.build.finalName}.jar</include> <!-- 指定需要拷贝的文件,这里指最后生成的 jar 包 -->
 </resource>
 </resources>
 </configuration>
 </plugin>
 </plugins>
</build>
如果提示maven插件无法导入,可以修改maven的配置文件conf/settings.xml,新增如下内容:
<pluginGroups>
 <pluginGroup>com.spotify</pluginGroup>
</pluginGroups>
然后
注意在导入依赖时要先引入依赖包——先不要配置configuration标签。
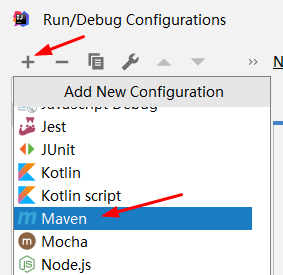
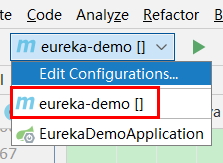
3. 新增 IDEA 启动配置
或者
docker run -d -p 8761:8761 --name eureka01 image_name
docker logs -f container_name
七、将本地服务器的docker镜像推送到阿里云私有仓库中
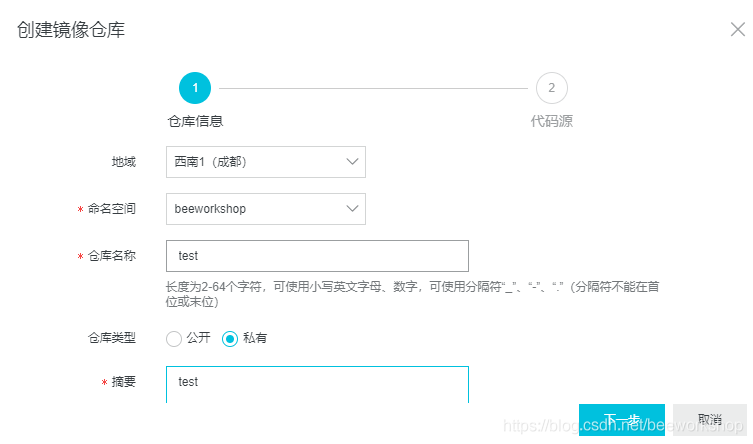
1. 创建阿里云镜像仓库
2. 向镜像仓库push你的镜像
根据操作指南操作即可。
八、创建本地镜像仓库
1. 新建本地仓库
本地仓库也是一个docker容器
docker pull registry

vim /usr/lib/systemd/system/docker.service
========================================================================
找到 Service 节点,在 ExecStart 属性末尾增加新参数,值为:
--insecure-registry 192.168.74.131:5000

vim /etc/docker/daemon.json
=========================================================================
末尾新增配置内容:
{
"insecure-registries":["192.168.74.131:5000"]
}

systemctl daemon-reload
systemctl restart docker

docker run -p 5000:5000 -v /opt/registry:/var/lib/registry --name registry -d registry
192.168.74.131指代本地业务服务器地址。
2. 浏览器查看本地仓库
http://ip:5000/v2
3. push 镜像
# 为镜像改名
docker tag [ImageId] ip:5000/[镜像名称]:[镜像版本号]
docker push ip:5000/[镜像名称]:[镜像版本号]
在浏览器中查看 push 结果
http://ip:5000/v2/_catalog
4. pull 镜像
docker pull ip:5000/[镜像名称]:[镜像版本号]
下一篇:查看nginx配置文件路径和资源文件路径的方法

